| WB2FKO Tower Project (Page 2) |
|
|
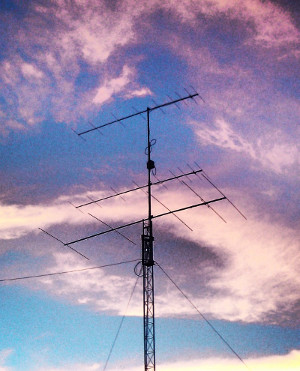
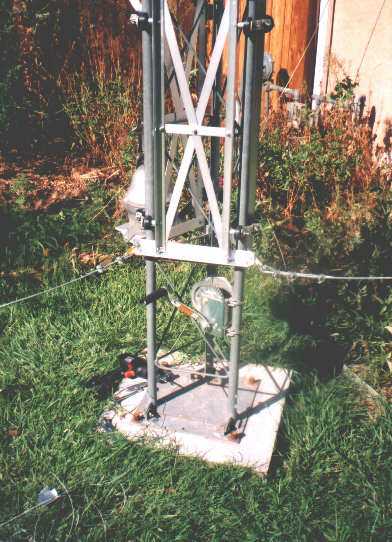
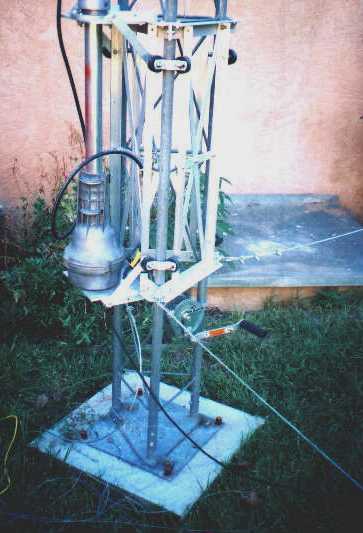
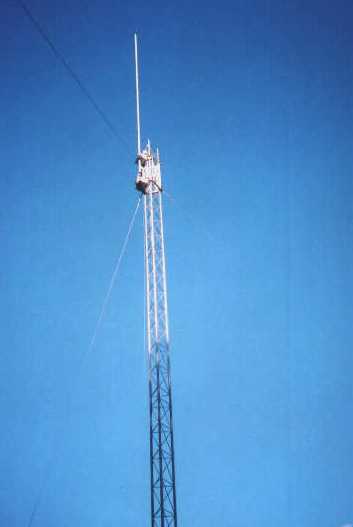
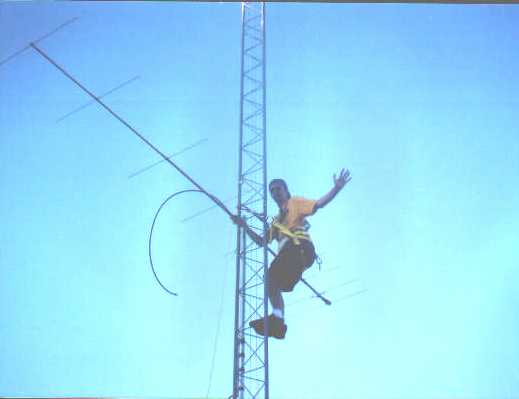
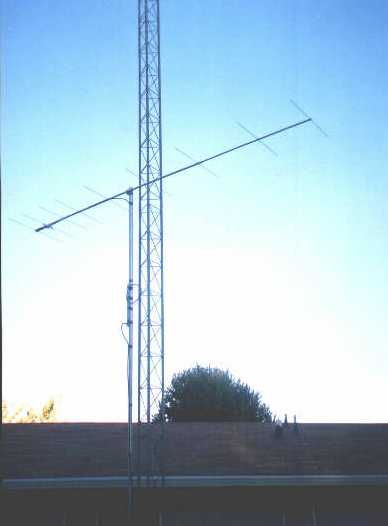
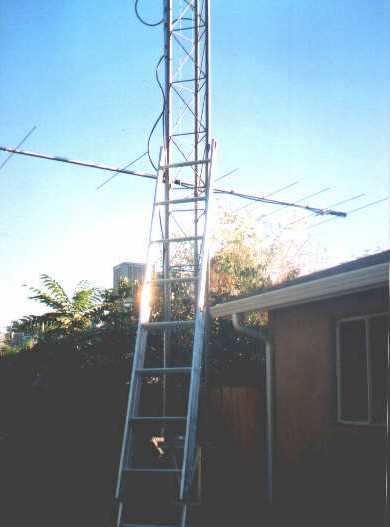
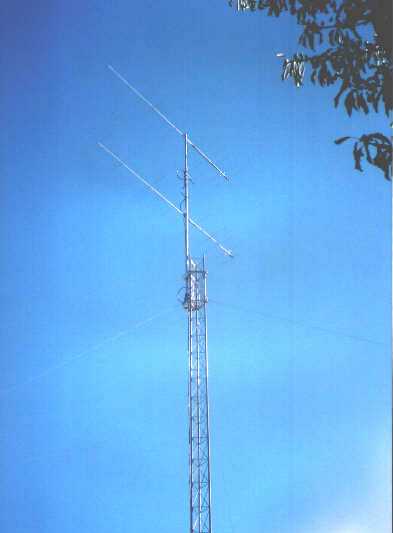
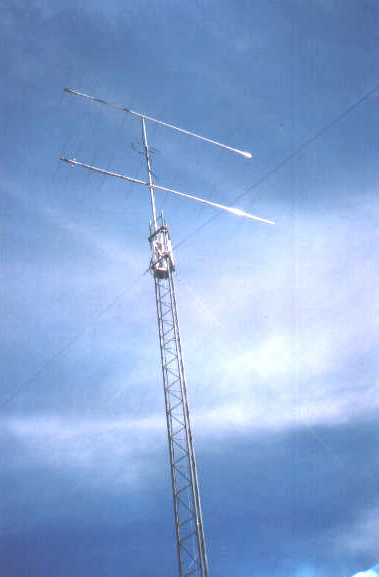
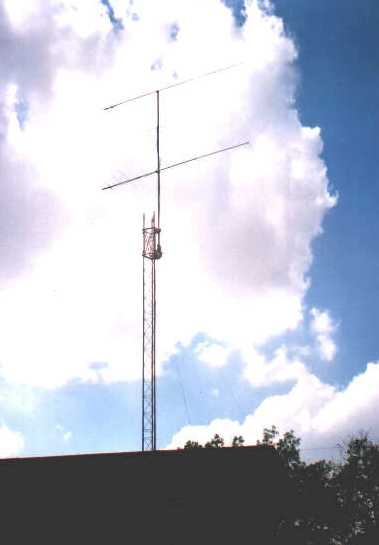
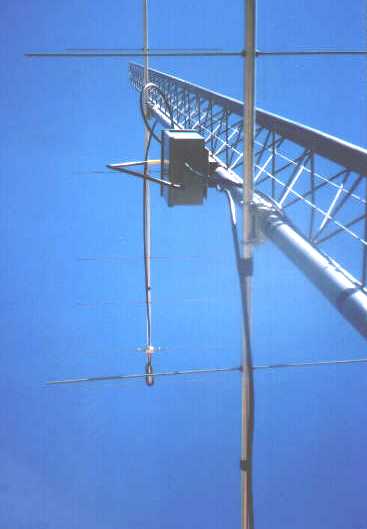
The mast is heavy steel fence top-rail. I bought a 21 foot piece here in town for about 35 bucks. Bob's little pickup again did the hauling. Since I had planned to run stacked beams, I needed a lot of mast (ended up using 19 feet) to get the required antenna separation and keep the lower beam far enough above the top of the tower so it wouldn't mess up the radiation pattern. That fence rail is very heavy and it was a two-man operation to get it mounted in the thrust bearing and rotor. I had to climb about 20 feet up the tower and lift the mast up so Bob could clamp it in place. Here's a look at the mast installed at ground level. After experiencing the assembly nightmare, I had less than full confidence in the Hazer's ability to support such a long, heavy mast. More than 15 feet of unsupported mast represents a lot of torque in a good wind and I'll admit I was worried. I decided to raise just the mast and see how it held up in the Albuquerque winds for a couple of weeks. After hanging tough in 40 mph gusts, I figured it had passed the reliability test. I was now ready for the antennas. The primary function of the new setup is high speed meteor scatter on 144 MHz. I decided to stack two 2M9SSB yagis made by M2 Inc in California. These antennas are designed for the low end of the 2-meter band where the weak signal activities take place. I opted for shorter antennas because experience has shown they are more effective at finding random meteors, i.e. long beams are more directional which can become a liability in meteor scatter. I also liked the fact that smaller antennas are easier to handle and I wasn't comfortable with any part of the array hanging over the neighbor's yard. Each 9-element antenna required about two hours to assemble. Antenna installation on the big mast was another two-man effort and took place on September 21, 2003 -- a warm, still, late summer day. This photo shows me about 25 feet up the tower installing the upper beam on top of the mast. Bob hauled it up to me using a rope and pulley, which I attached to a tower cross member at about my head level. I'm wearing a lineman's harness that allows me to lean away from the tower and use both hands. Since the Hazer was down for the installation, the tower was completely un-guyed. Even though I'm only halfway up, the tower would sway noticeably with my every move. I had to keep reminding myself that it was solid and after 10 minutes up there I got used to it. But I actually feel more comfortable at 35 feet with the guy wires tight. Here's a photo of the top antenna in place. You can see the power divider about 6 feet below it. The lower beam was installed using a ladder, but I carelessly bent one of the elements climbing down. I bent it back into place, but I knew it had been a long day and I was tired. And I vowed to wear heavy-soled work shoes for future tower climbing. My feet hurt for the next couple of days from standing for so long on those narrow rungs. It was dark by the time Bob and I finished, so I took pictures of the raised antennas the following morning. Here's another shot a few days later against a cloudy sky and a view from the street in front. The top antenna is about 53 feet above the ground with the lower one exactly 9'6" below it. Initial testing indicated the array was radiating power nicely, but I wasn't hearing too well. This problem was addressed by lowering the assembly and installing a preamplifier just below the power divider. The preamp has helped considerably. A 5-element 6M5AX 6-meter beam was added in June 2007. My Hazer nightmare took place in the Spring of 2004. You can read that chapter of the story by clicking here. |
|
|